In this digital age, everyone has digital devices through which they can capture their moments. In those moments, they want to add spark and creativity that make their moments defining and more memorable. But software in their devices is limited and some are highly premium. So, how will you add creativity to your albums to make them defining? Is there any toolkit available that can help you with that? Is that toolkit capable of sparking your creativity? The answer is Yes. That toolkit is CapCut Online Photo Editor.
CapCut online photo editor has gained much popularity in a short period. This editor tool is much easier to use and more reliable, and every professional is shifting to it. The other reason that CapCut is gaining popularity and forcing professionals to use it is because of its amazing features. All the features that CapCut online photo editor offers are free, including a transparent background maker, and quite enough for you to make your memories creative in their way by editing them. Then let’s talk about them.
Amazing Features of CapCut Online Photo Editor:
Following are some amazing features of CapCut Online Photo Editor.
Ø Range of Impressive Effects:
CapCut Online Photo Editor offers a vast range of impressive and useful effects. These effects include Saturation, Brightness, Exposure, Contrast, Warmth, Vibrancy, Highlights, Shadows, and many more alike. With the help of these effects, you can adjust the colors of your photos. You can add details using saturation and warmth. You can make it attractive using vibrancy and exposure. All these effects offered by CapCut online photo editor are valuable to your photos.
For advertising purposes, you can use these effects to make your advertising post stand out from its competitors. You can use an image palette enhancer to enhance the quality of your image.
Ø Attractive Filters:
CapCut online photo editor offers its users a vast range of attractive filters. By using those filters, you do not need to edit your image anymore. You have to go to the portion of the filter and choose any filter suitable to your photo. Adding the filter to your photo is just a one-click step. You can make your photo aesthetic vintage, black & white (b&w), and many others using these filters.


You can also control the detailing of these features by controlling the opacity. The opacity for each filter is given just below that filter. You can maintain the opacity of that filter accordingly and make it visible as you want.
Ø Background Removal:
CapCut Online Photo Editor has introduced this feature and makes it free for its users. Now, you can remove or change the background of your photo or any other photo in one click. This feature is free, and you can access it in just one click. Just choose the photo whose background you want to remove and select this feature. This feature will work automatically according to the advanced algorithm, and the background of your photo will be removed in less than a minute.
Ø Variety of Fonts:
CapCut Online Photo Editor has made everything easy and free for its users. Those premium texts that you want to write on your photo are now free on CapCut Online Photo Editor. You can access the hundreds of texts in the CapCut library and use them on your photos to make them attractive. Using suitable text will deliver your message.
Ways to Use the CapCut Online Image Editor:
Following are the ways by which you can use the CapCut online image editor and design any sharpen image.
1. Accessing and Register:
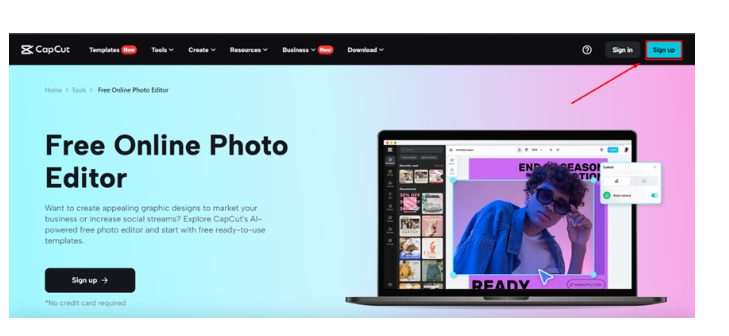
Any browser can be used to access CapCut Online Image Editor. Using your preferred browser, search for it and choose the top result from the list of links. The SignUp button will be highlighted in blue there.
When you tap on it, a page with options to join the CapCut via different platforms appears. You can access the CapCut online editor by logging in with the help of your Google Account. After signing in, the following page will pop up.
2. Choose the Image Category:
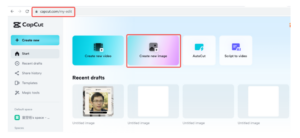
If you are an image editor, choose the Create new image option shown in the image.
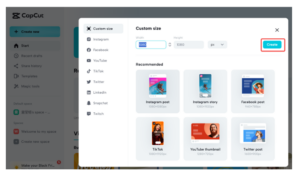
Following your selection of the “Create new image” button, the following new page will appear:
This is where you can view the range of choices for your photo, including its width and height in pixels. To define the dimensions of your photo, choose the appropriate width and height. Next, click the “Create” button.
3. Begin Editing:
Upon selecting the Create button, the following page will appear on your screen:
The range of options is visible, covering templates, designs, texts, shapes, stickers, frames, and more. Select the layout and begin adjusting your photo using various tools.
4. Downloading the File:
Once all your editing is done, you can download your final product by clicking on the blue button in the top right corner. And your computer now has the final edited file on it.


